Wednesday, April 27, 2011

What I Wore Wednesday #6 Nerd Alert!

This began as a regular men's t-shirt... and today I'm showing you how to make it into a dress!


A friend of ours gave Brendan some old shirts to use for work. He is always getting covered in grease and filth, and he ruins clothes pretty frequently. I found a few treasures in the bag of shirts as well, including this Rubik's cube shirt, which I thought would make a cute dress.
I started with a men's XL t-shirt. It isn't quite long enough to be a dress, so I paired it with some leggings for a fun little tunic.


Here are the basic steps to follow:


1. Begin by cutting off the sleeves and collar. Follow just inside the seam lines. Set the sleeves aside.
2. Turn the shirt inside out and put it on. Then place safety pins along each side. This is where you can determine the fit... place pins closer to your body for a tighter fit, and further for a more loose fit.
3. Take off the shirt and lay it out flat. Use chalk or a disappearing ink marker to mark along the pins.
4. Sew along the chalk line, removing the pins as you go. If your machine has a stretch stitch, use it here. If not, use a long thin zigzag stitch. After you've sewn along the lines, cut the excess fabric about 1/4" from the seam.

Now for the sleeves...


5. I trimmed down the original sleeves even more, making a basic tank top cut. Grab the sleeves you set aside earlier.
6. Turn the sleeve inside out, and place it in the arm hole, right sides together. Beginning at the bottom, start pinning around the circle.
7.The sleeves will have a wider circumfrence than your open arm holes, so make a large pleat at the top of the sleeves and pin. This will create that ruffled/flared sleeve.
8. Sew around the outside with a 1/4" stretch seam or zigzag.

9. Trim the sleeves to your desired length by marking the top and bottom with chalk and cutting from one mark to the other.
Now your dress should be ready to wear!
I love this because it is customize-able to the fit of your choice. You can choose any type of sleeve or no sleeve at all!

I hope some of you try this! I'm going to make a few more... that bag was packed full of quirky t-shirts that I'd like to customize.

I hope you are enjoying your week!

DON'T FORGET Craft Couture is hosting a giveaway for my shop! Head over to enter!
Giveaway closes tonight at 11:59 pm :)

Thursday, April 21, 2011

Giveaway on Craft Couture

Hi friends!
I'm very excited to let everyone know that Craft Couture is hosting a giveaway for my shop!
You can enter by visiting Craft Couture Here
Craft Couture

You could be the lucky winner of a $15 shop credit.
The giveaway closes next Thursday 4/28, so make sure to get your entries in!
Thank you, Craft Couture for hosting :)

Wednesday, April 20, 2011

What I Wore Wednesday #5

This week's WIWW will be just a quick post.
My outfit is kind of.. meh.
And there's an idea I want to run by you guys.

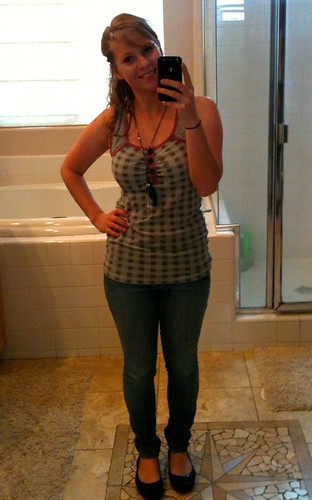
Ok, so here's what I wore today:
WIWW 5

Top: Nordstrom Rack (the brand is Scrapbook... LOVE their stuff!)
Skinnies: Forever 21
Flats: Nordstrom Rack
Necklace: Charlotte Russe (I think?)

Ever since high school, I've classified myself as a "jeans & t-shirt kinda girl." Recently I've been trying to step it up a notch by wearing more blousey (is that a word?) tops instead of t-shirts. It has been my attempt to come across as more feminine and more... umm... grown up?
But every day when I put on a pair of jeans, it feels like I'm giving up, and resigning to casual jean-dom forever.
The bottom line is that I need to make more of an effort.
I want to try to get something going... an event here on my blog!
How would you feel about me hosting a "No Jeans Week"?

Source
A whole week with no jeans.

Think I can do it?
During that week I'd like to post tutorials for skirts & dresses.
Maybe have a giveaway?
Maybe a link party?
How do you feel about May 30th as a start date?
Any suggestions from you guys would be appreciated.

What are you wearing this wonderful Wednesday?

Tuesday, April 19, 2011

Feather Hair Clip

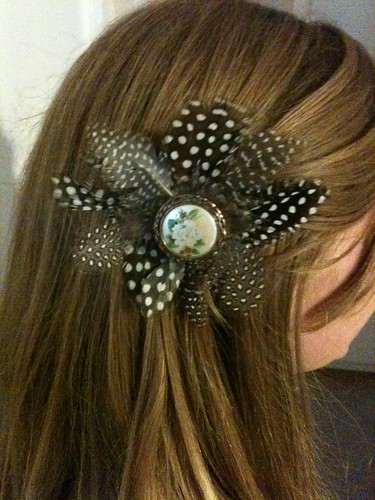
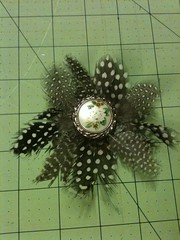
I thought I'd pop in for a minute to share this pretty little thing I made using Eisy Morgan's Feather Hairclip Tutorial.
It was very simple. I'm really into these guinea feathers right now. So whispy, and you gotta love the spots... you can find them at most craft stores.
For the center I sewed on a button, and covered it with one of my grandmother's vintage button covers... it just snaps onto the button, and SHAZAM! Instant vintage glam.

Have a happy Tuesday :)

Sunday, April 17, 2011

June Cleaver Skirt Tutorial (easy!)


I’m naming this the June Cleaver skirt because this was the scene on the day I made it:
(Boyfriend walks in the door & is ambushed by my excitement)
Me (twirling): Look what I made!
Brendan: Neat.
Me: Neat?
Brendan: It looks kinda… housewifey?

I thought it looked sort of like an apron as well. So I decided I would pay a little homage to the OG Housewife. Here goes... 
You will need:
Elastic at least 2” wide
1-2 yards of fabric
Sewing machine & thread
Scissors or rotary cutter

First measure your waist where you would like the waistband to be, and cut the elastic to that measurement. Do not allow for seam allowance because you want it to be slightly stretched while you are wearing it.


Now sew a zig-zag or serging stitch to the edges of the elastic.


Next measure from your waist to where on your leg you would like your skirt to fall. Include 1” for the bottom hem.


If you are attaching the elastic to the selvage edge like I did, then you do not need to add any extra. If you aren’t using the selvage edge of your fabric, you will need to hem all the raw edges, so add another 1” to this measurement.

If you would like your finished skirt to be more narrow/pencil skirty like mine, multiply your waist measurement by 1.5. If you would like it to be wider and more gathered and billowy, multiply by 2.
My waist measurement was 29” so I multiplied by 1.5 to get 43.5, which I rounded up to 44”.
So my fabric panel will be 44” by 18” (my desired length plus 1”).


Hem the long edge by folding fabric over ½” from the edge and pressing, then folding over another ½” then pressing again. Stitch about 5/8” from the edge.


Repeat these hemming steps on the short edges, and the top edge if you are not using the selvage.


Now we will be attaching the elastic waistband to the body of the skirt.
Align the top edge of the elastic to the top edge of the body fabric (right side facing up). Place a pin at each end, flush with the shorter edges. Now pull the elastic tight until the body fabric is flush with the elastic, and place a pin in the middle. You may need an extra pair of hands for this.

Now stretch from one end to the middle, then from the middle to the other end, so you have five pins which are approximately the same distance apart.


Now we are going to sew along the long edge attaching the elastic. Use a 3/8” seam allowance. Begin sewing where you placed your first pin, making sure to backstitch. As you sew, grip the top edge of elastic with your right hand, and with your left hand pull firmly from where your next pin is located. The elastic should stretch so that it lays evenly with the fabric.


Continue all the way along this seam, firmly stretching the fabric as you go.
When you are finished, you should have your waistband and skirt body attached.


The finishing step is easy. Fold your project in half, right sides together, and sew a seam right along the short edge on the inside of the hem lines. Remember to backstitch at the top and bottom.


Now turn it inside out and wear it!!

I hope you enjoyed this tutorial. I'd love to see if you make one!
Let me know if you need some clarification, or if there are any questions.
Hope you had a fabulous weekend :)


Wednesday, April 13, 2011

What I Wore Wednesday #4 Plus a Headband Tutorial

Hello friends, and welcome to my new followers. I'm really glad you're here!
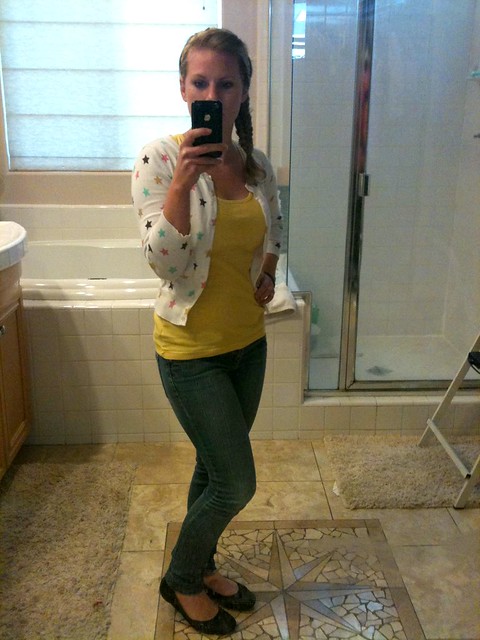
Today I wore a pretty simple outfit:
picnikfile_Yboy90

Yellow tank: Forever 21
Cardigan: Ross
Skinnies: Forever 21
Flats: Nordstrom Rack
Headband: Made by me (scroll down for tutorial)

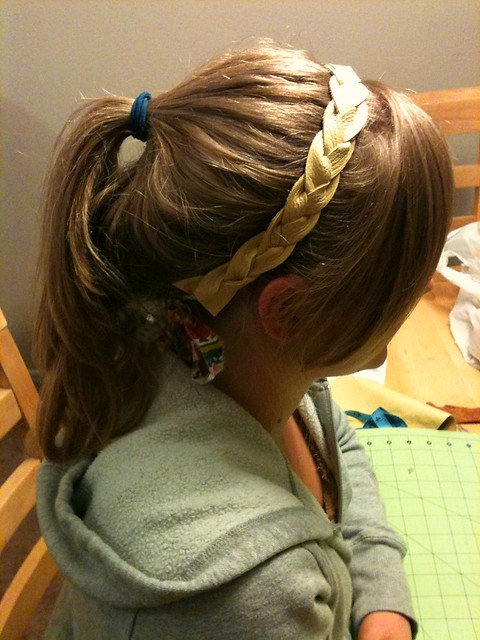
I'm focusing more on my hair today. I'm going to show you how to make a fabulous braided leather headband using the mystery braid technique. We will also discuss my newfound love of the fishtail braid.

I snagged a bag of leather scraps from Michael's for like $8 and it ended up being perfect for little projects like this one. Use a coupon and it's a steal. Let's get started!
You will need:
Leather (about 18" long)
Sharp scissors
fabric (about 8")
Rotary cutting tools optional

First measure your head. Start about 1" behind your ear, or where you usually wear a headband comfortably, and bring the measuring tape around to the other side. Take that measurement and add 1". My pea head measured 16", so my band will be 17".
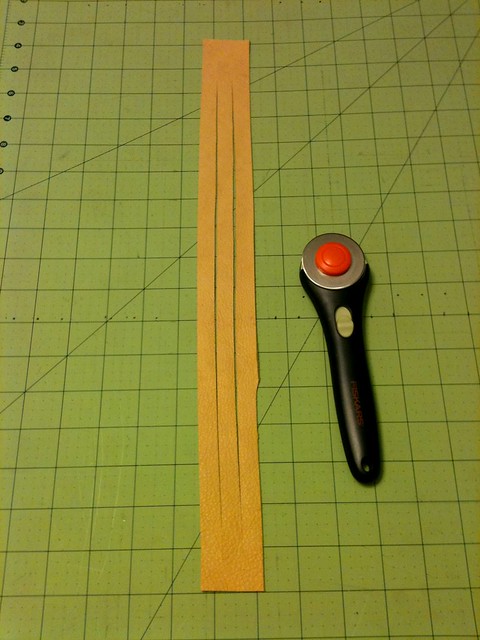
This requires only one piece of leather, which should be (insert your measurement here) by 1.5".
Beginning about 1" from the short edge, cut into the leather at 1/2" intervals. MAKE SURE TO STOP 1" FROM THE EDGE! The mystery braid technique requires both ends to remain intact.
picnikfile_bIu_vP
Now, at this point, I'm going to direct you to Martha. I learned this technique from her website about a year ago, and she explains it better than I ever could. After all, she's Martha Stewart. She does everything better.
Some tips:
I usually use a binder clip to secure the leather to my cutting mat. You could use a clip board or some other apparatus to secure it while you braid.

Begin braiding as tightly as possible. You can even out the whole thing and loosen it up if there is extra room at the bottom.
Leave enough space for sets of two: When you tuck into the right side, make sure you have space to untuck on the left side.
If Martha's pictures are too confusing, try searching "mystery braid" on Youtube. Everyone does it differently, so it should help to see a few videos.

Now you have a braided strip that is intact on both ends.
picnikfile_xj6KZ9
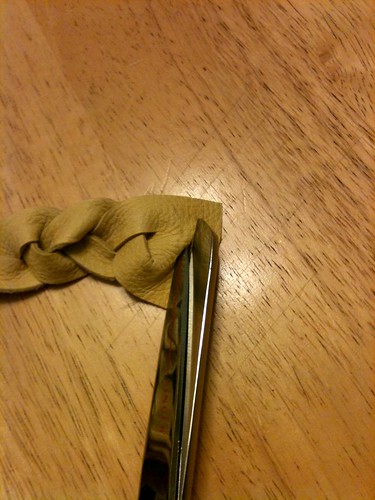
Take some sharp scissors and cut a tiny slit in the middle of each end. It should be about 1/4"
picnikfile_ae8lSO
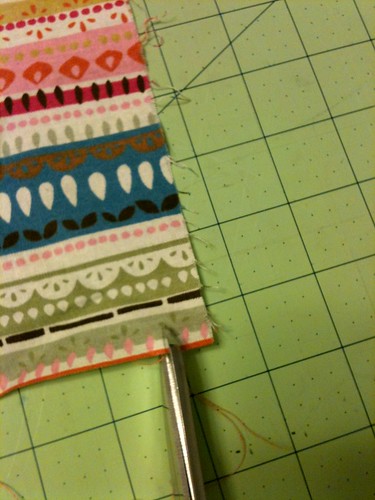
Now take your fabric scraps and snip about 1/2" from the edge.
picnikfile_czf3B4
Grab the corner and rip it! This creates a great frayed strip of fabric, which you will use to tie a bow at the back of the band. You'll need two of these. They can be any length but I recommend at least 7-8".
Tie a few knots to the end of each fabric strip.
picnikfile_69LSRh
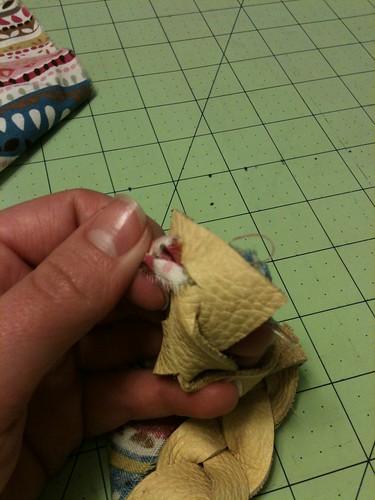
Insert the un-knotted end of each strip through the holes you cut in the ends of the leater. I used a bobby pin to coax it through.
Now wrap it around your head, and tie the fabric strips in a bow at the back.
Tada!
picnikfile_q1XUxp
You can ponytail it like I did here, or you can get a little fancier.
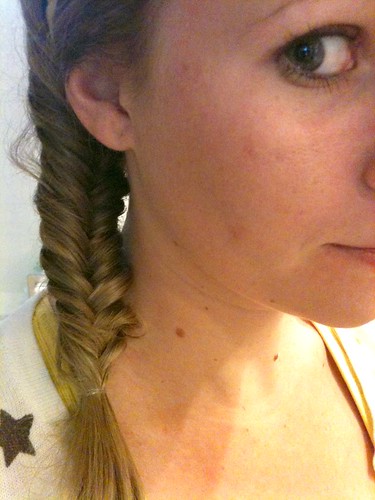
I saw this tutorial on Grosgrain yesterday, and have been fervently practicing.
I think I've finally got the fishtail braid down to a science.
It helps if my hair is slightly damp.
picnikfile_iHD8-6
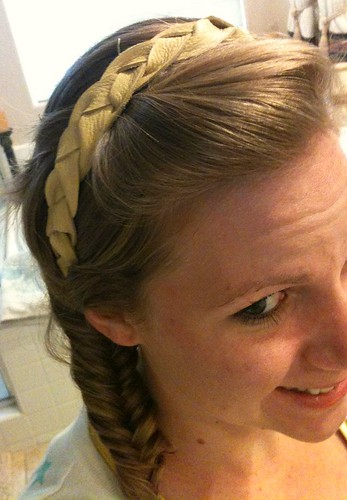
Now combine your new leather headband with a fabulous fishtail braid, and you've got a showstopping 'do!
picnikfile__BlZZZ

Thanks for stopping by, I hope you have enjoyed this simple style project!

Tuesday, April 5, 2011

Throw Pillow Knock-Off

Pottery Barn has beautiful stuff. I would love to live in one of their catalogues, but I can't even imagine what that would cost.
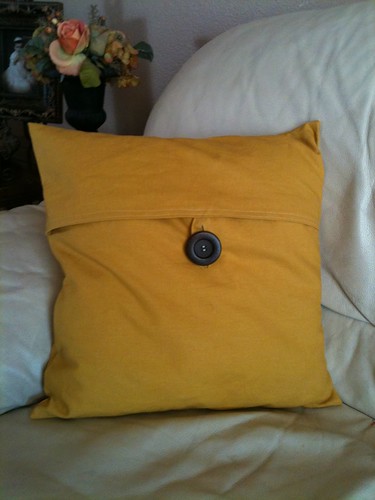
These pillows are lovely, and I wanted (at least) one.


So I put my skills to work and exercized the sincerest form of flattery.
PB Knockoff Pillow 1

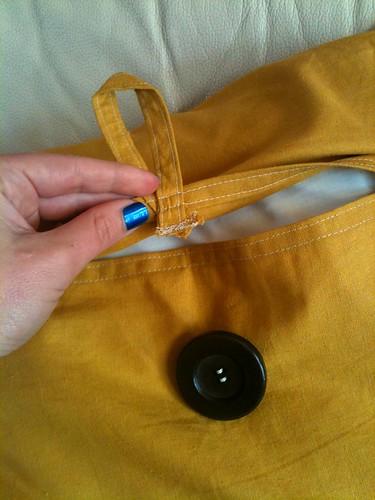
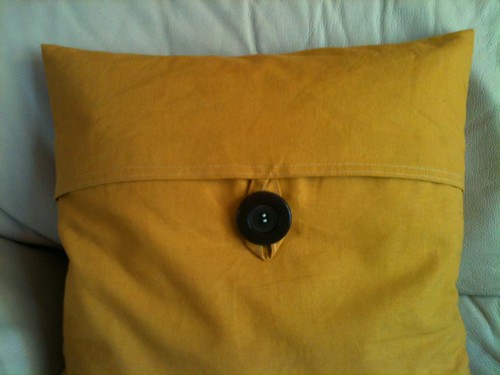
It's just a basic "evelope-style" pillow with a big ole button and a little fabric loop.
PB Knockoff Pillow 4

PB Knockoff Pillow 3

So Now I want one in every color!
I'm linking up at all these awesome places this week:

Blogger's Pillow Party


Monday, April 4, 2011

Well Hi There!

I've been away for a little bit. I went to visit my friend in BEAUTIFUL Austin, TX this weekend.
Texas has pretty much been public enemy number one since my best friend Karina moved there last year. I will never forgive Texas for taking her away from me. But it's pretty hard to hate this:


The humidity was, let's just say unpleasant (sticky, miserable, unbearable), but it was worth it. We did some fun sightseeing, and went on random adventures. I wish I could have stayed longer. I'm already looking at ticket prices to see when I can go back!
Anyway, today is the day to play catch up, so I'm a little bit frantic. I have homework to do and Etsy orders to ship. I'll be back tomorrow with a fun knock-off project I did before the weekend. Hope you're having a wonderful Monday :)