Showing posts with label fashion. Show all posts

Wednesday, August 17, 2011

A more sophisticated me

I'm 23 years old.
I'm 10 units away from my bachelor's degree.
I live away from home.
I have a dog.
I'm a grown up.
I have no idea when that last thing happened, but whether I like it or not, it's the truth. I made some promises to myself that I was going to start making a few changes. Most of these promises stemmed from the new beginning, which I posted about recently.
I'm taking on a lot of new responsibilities on unfamiliar ground, and risk-taking is now something I'm doing daily. 
So why do I still roll out of bed every morning and throw on a tshirt and jeans? Because it's easy, it's familiar, and it's safe. Part of having a successful business is being mindful of how others perceive you... and haphazardly pulling on too-casual clothing is no longer going to cut it if I want to be happy with myself and say honestly that I'm trying my best.
Very recently I started filling in my eyebrows and wearing lip stain (not lipstick people, I'm nowhere near ready for that). I also started waking up early enough to apply it in front of my bathroom mirror and not while sitting at a red light on the way to work. It's going well so far.
But I'd still like to step it up a bit in terms of my appearance. I'm talking about outfit planning, accessorizing, and wearing my hair in styles other than a ponytail.
You can check out my entire style pinboard in Pinterest, but here are a few of my favorite items and outfits that I use to get inspired...
Source: polyvore.com via Amy on Pinterest
Source: None via Amy on Pinterest


Source: None via Amy on Pinterest


Well, we will just have to see where this goes. Baby steps folks.

Wednesday, June 29, 2011

What I Wore Wednesday {New Leather Belt}

So I got this belt at a thrift store over the weekend. I got some other great stuff too but this was the only wearable item I picked up. And boy have I been wearing it!
I paired it with this summery outfit on Monday:
Top: Target
Belt: Thrifted
Shorts" Forever 21
Sandals: Rack Room
This top works for any season... that's why I love it. I think it was on clearance when I got it at Tarjay too :)
I call these sandals my "Jerusalem Cruisers"... they are from a store at the Camarillo Outlets.

I wore my leather belt again last night to dinner and a movie with Brendan, but didn't get any photos..
Today I'm wearing it with this vest and skinny jeans.

Layering tank: Forever 21
Vest: Old Navy
Belt: Thrifted
Skinnies: Forever 21
Flats: Gap
Watch: birthday gift from Brendan
Ring: Great-grandma's engagement ring
Necklace: Made by my sister Jessica
I love this belt and I'm probably going to continue to wear it with everything!
I'm also really enjoying this summer weather, and already looking forward to the weekend :)


Wednesday, June 1, 2011

What I Wore Wednesday {Tie Dye}

Tie dye is so fun and summery.
It reminds me of bbq's
beaches
festivals...
...just SUMMER!
I bought this dress awhile ago but never wore it. To be honest, it was really cheap and I bought it for the belt that came with it. I dug it out of my closet this morning and realized that I had used the belt for another outfit, and I couldn't find it anywhere. Darn. It was a simple black elastic belt that snapped together.
But I was able to make it work with this turquoise belt and it adds a little more color. I'm sorry the photos are so blah... I'm still using my iPhone because my camera is broken.

 The shape of the dress is kind of drapey and not something I would usually wear, but I'm all about stepping out of my comfort zone these days. I don't know what that's about, but I think it's a good thing.
Dress: Wet Seal
Belt: Ross
Shoes: Nordstrom Rack

I'm linking up to WIWW on The Pleated Poppy
I'm having a reader appreciation giveaway when I reach 50 followers! Become a follower and get a chance at winning this cute little crossbody satchel {made by me!}


Tuesday, May 10, 2011

Look What I Made... Wanna Win It?

Hi there. I'm so so SO excited to share my most recent project with you! I've been admiring these little leather cross body bags. Here are some I really like:
Anthro
Fossil
I thought since I have been working with vinyl a lot lately that I could manage something like this. So I went to work last night on a black faux leather crossbody purse.
...And I did it!
leather bag 3
leather bag 4
It is the perfect size to hold all of my essential items. But it's small enought that it doesn't allow me to collect junk (which I tend to do when I have the capacity of a large bag).
leather bag 5
The inside pattern is a geometric Amy Butler Home Dec fabric... which I've had forever but hadn't got around to actually using. I think it works well here.
Here's my outfit for the day:
leather bag 1
Top: Ragdolls
Jeans: Seven for all mankind (ebay!)
Shoes: BC footwear (Nordstrom Rack)
Necklace: Mandipidy
Purse: made by me!
leather bag 2

Ok, wanna win the purse?
I'd like to announce my first reader appreciation giveaway! When My blog reaches 50 follwers, I'll have a giveaway and this will be the prize! As of right now, I'm at 42 follwers. So tell your friends about my blog, my shop, or just about this great purse and we'll have a giveaway!
I'm looking forward to meeting new friends :)
Click "follow" on the left ---->

Wednesday, April 27, 2011

What I Wore Wednesday #6 Nerd Alert!

This began as a regular men's t-shirt... and today I'm showing you how to make it into a dress!


A friend of ours gave Brendan some old shirts to use for work. He is always getting covered in grease and filth, and he ruins clothes pretty frequently. I found a few treasures in the bag of shirts as well, including this Rubik's cube shirt, which I thought would make a cute dress.
I started with a men's XL t-shirt. It isn't quite long enough to be a dress, so I paired it with some leggings for a fun little tunic.


Here are the basic steps to follow:


1. Begin by cutting off the sleeves and collar. Follow just inside the seam lines. Set the sleeves aside.
2. Turn the shirt inside out and put it on. Then place safety pins along each side. This is where you can determine the fit... place pins closer to your body for a tighter fit, and further for a more loose fit.
3. Take off the shirt and lay it out flat. Use chalk or a disappearing ink marker to mark along the pins.
4. Sew along the chalk line, removing the pins as you go. If your machine has a stretch stitch, use it here. If not, use a long thin zigzag stitch. After you've sewn along the lines, cut the excess fabric about 1/4" from the seam.

Now for the sleeves...


5. I trimmed down the original sleeves even more, making a basic tank top cut. Grab the sleeves you set aside earlier.
6. Turn the sleeve inside out, and place it in the arm hole, right sides together. Beginning at the bottom, start pinning around the circle.
7.The sleeves will have a wider circumfrence than your open arm holes, so make a large pleat at the top of the sleeves and pin. This will create that ruffled/flared sleeve.
8. Sew around the outside with a 1/4" stretch seam or zigzag.

9. Trim the sleeves to your desired length by marking the top and bottom with chalk and cutting from one mark to the other.
Now your dress should be ready to wear!
I love this because it is customize-able to the fit of your choice. You can choose any type of sleeve or no sleeve at all!

I hope some of you try this! I'm going to make a few more... that bag was packed full of quirky t-shirts that I'd like to customize.

I hope you are enjoying your week!

DON'T FORGET Craft Couture is hosting a giveaway for my shop! Head over to enter!
Giveaway closes tonight at 11:59 pm :)

Sunday, April 17, 2011

June Cleaver Skirt Tutorial (easy!)


I’m naming this the June Cleaver skirt because this was the scene on the day I made it:
(Boyfriend walks in the door & is ambushed by my excitement)
Me (twirling): Look what I made!
Brendan: Neat.
Me: Neat?
Brendan: It looks kinda… housewifey?

I thought it looked sort of like an apron as well. So I decided I would pay a little homage to the OG Housewife. Here goes... 
You will need:
Elastic at least 2” wide
1-2 yards of fabric
Sewing machine & thread
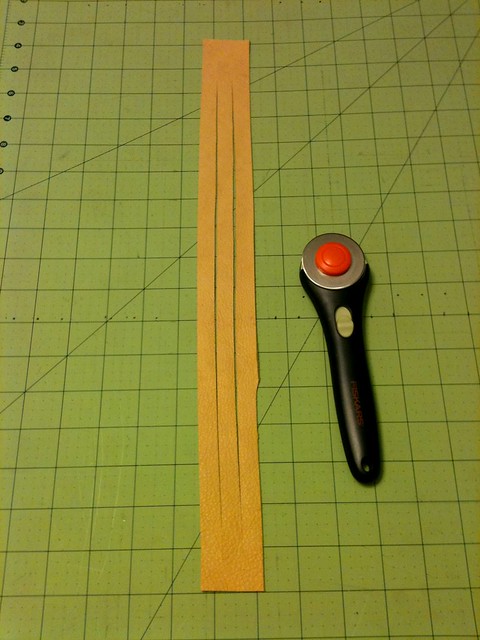
Scissors or rotary cutter

First measure your waist where you would like the waistband to be, and cut the elastic to that measurement. Do not allow for seam allowance because you want it to be slightly stretched while you are wearing it.


Now sew a zig-zag or serging stitch to the edges of the elastic.


Next measure from your waist to where on your leg you would like your skirt to fall. Include 1” for the bottom hem.


If you are attaching the elastic to the selvage edge like I did, then you do not need to add any extra. If you aren’t using the selvage edge of your fabric, you will need to hem all the raw edges, so add another 1” to this measurement.

If you would like your finished skirt to be more narrow/pencil skirty like mine, multiply your waist measurement by 1.5. If you would like it to be wider and more gathered and billowy, multiply by 2.
My waist measurement was 29” so I multiplied by 1.5 to get 43.5, which I rounded up to 44”.
So my fabric panel will be 44” by 18” (my desired length plus 1”).


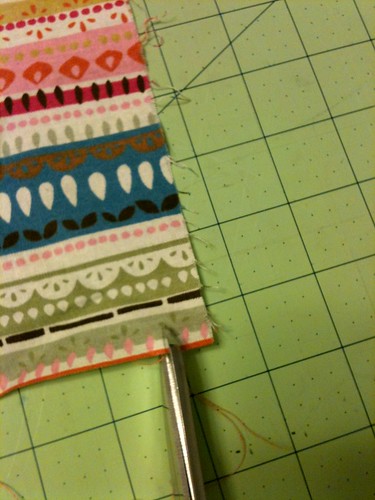
Hem the long edge by folding fabric over ½” from the edge and pressing, then folding over another ½” then pressing again. Stitch about 5/8” from the edge.


Repeat these hemming steps on the short edges, and the top edge if you are not using the selvage.


Now we will be attaching the elastic waistband to the body of the skirt.
Align the top edge of the elastic to the top edge of the body fabric (right side facing up). Place a pin at each end, flush with the shorter edges. Now pull the elastic tight until the body fabric is flush with the elastic, and place a pin in the middle. You may need an extra pair of hands for this.

Now stretch from one end to the middle, then from the middle to the other end, so you have five pins which are approximately the same distance apart.


Now we are going to sew along the long edge attaching the elastic. Use a 3/8” seam allowance. Begin sewing where you placed your first pin, making sure to backstitch. As you sew, grip the top edge of elastic with your right hand, and with your left hand pull firmly from where your next pin is located. The elastic should stretch so that it lays evenly with the fabric.


Continue all the way along this seam, firmly stretching the fabric as you go.
When you are finished, you should have your waistband and skirt body attached.


The finishing step is easy. Fold your project in half, right sides together, and sew a seam right along the short edge on the inside of the hem lines. Remember to backstitch at the top and bottom.


Now turn it inside out and wear it!!

I hope you enjoyed this tutorial. I'd love to see if you make one!
Let me know if you need some clarification, or if there are any questions.
Hope you had a fabulous weekend :)


Wednesday, April 13, 2011

What I Wore Wednesday #4 Plus a Headband Tutorial

Hello friends, and welcome to my new followers. I'm really glad you're here!
Today I wore a pretty simple outfit:
picnikfile_Yboy90

Yellow tank: Forever 21
Cardigan: Ross
Skinnies: Forever 21
Flats: Nordstrom Rack
Headband: Made by me (scroll down for tutorial)

I'm focusing more on my hair today. I'm going to show you how to make a fabulous braided leather headband using the mystery braid technique. We will also discuss my newfound love of the fishtail braid.

I snagged a bag of leather scraps from Michael's for like $8 and it ended up being perfect for little projects like this one. Use a coupon and it's a steal. Let's get started!
You will need:
Leather (about 18" long)
Sharp scissors
fabric (about 8")
Rotary cutting tools optional

First measure your head. Start about 1" behind your ear, or where you usually wear a headband comfortably, and bring the measuring tape around to the other side. Take that measurement and add 1". My pea head measured 16", so my band will be 17".
This requires only one piece of leather, which should be (insert your measurement here) by 1.5".
Beginning about 1" from the short edge, cut into the leather at 1/2" intervals. MAKE SURE TO STOP 1" FROM THE EDGE! The mystery braid technique requires both ends to remain intact.
picnikfile_bIu_vP
Now, at this point, I'm going to direct you to Martha. I learned this technique from her website about a year ago, and she explains it better than I ever could. After all, she's Martha Stewart. She does everything better.
Some tips:
I usually use a binder clip to secure the leather to my cutting mat. You could use a clip board or some other apparatus to secure it while you braid.

Begin braiding as tightly as possible. You can even out the whole thing and loosen it up if there is extra room at the bottom.
Leave enough space for sets of two: When you tuck into the right side, make sure you have space to untuck on the left side.
If Martha's pictures are too confusing, try searching "mystery braid" on Youtube. Everyone does it differently, so it should help to see a few videos.

Now you have a braided strip that is intact on both ends.
picnikfile_xj6KZ9
Take some sharp scissors and cut a tiny slit in the middle of each end. It should be about 1/4"
picnikfile_ae8lSO
Now take your fabric scraps and snip about 1/2" from the edge.
picnikfile_czf3B4
Grab the corner and rip it! This creates a great frayed strip of fabric, which you will use to tie a bow at the back of the band. You'll need two of these. They can be any length but I recommend at least 7-8".
Tie a few knots to the end of each fabric strip.
picnikfile_69LSRh
Insert the un-knotted end of each strip through the holes you cut in the ends of the leater. I used a bobby pin to coax it through.
Now wrap it around your head, and tie the fabric strips in a bow at the back.
Tada!
picnikfile_q1XUxp
You can ponytail it like I did here, or you can get a little fancier.
I saw this tutorial on Grosgrain yesterday, and have been fervently practicing.
I think I've finally got the fishtail braid down to a science.
It helps if my hair is slightly damp.
picnikfile_iHD8-6
Now combine your new leather headband with a fabulous fishtail braid, and you've got a showstopping 'do!
picnikfile__BlZZZ

Thanks for stopping by, I hope you have enjoyed this simple style project!